Showing posts with label Dress Up. Show all posts

Saturday, October 21, 2017

Maui and Moana dress ups

Sprog and Widget were invited to a Moana party and wanted to dress up. Sprog, age 5 1/2 chose Maui, and Widget, age not quite 3, wanted to be Moana.

Image result for maui and moana Image result for moana

My general plan was for Maui's costume to be a shirt and shorts base with a leafy skirt and other accoutrements over top. I used the Beachcomber Shorts from Peek-a-boo Pattern Shop and the Bookworm Button Up from Blank Slate Patterns. Both of which I have used recently for Sprogs Star Wars Shorts, and Widget's Bob the Builder and Pirate shirts.

For fabric, I went to our local emporium where I knew they had tapa cloth styled cotton in multiple cotton. I hoped for tan and red, and ended up with brown and red. The red was for Moana,   In addition I found a large green/blue broach style button for The Heart of Te Fiti (I really really want to spell that the Te Reo Maori way of Te Whiti), a white shell coloured beading with silver ferns on it, a plastic "grass" skirt, and some plastic sacking like material. I'm not really sure what it is.
 
For the Maui costume I bought some large squares of felt in an off-white/bone colour, and some green weed mat, which would be the basis for Maui's leaf skirt, but supplemented with green scraps from my stash.  

Maui
 I started Maui with a shorts and shirt combo to act as the base. 

The beachcomber shorts I made as per the pattern, but with a higher back rise and a shorter front rise to allow for Sprogs shape. This made them a bit snug to pull on but a great fit once they were.

The shirt was adapted. Firstly, I didn't do the collar, but included the collar stand for a Mandarin neckline. The front was cut on the fold instead of in two pieces. I still cut one placket piece as per the pattern and used it on a half placket for a pull over the head shirt. Pockets and sleeve details were left off. Sprog was so pleased with it he wore just this part of the costume as much as he could all weekend.


Next up was the leafy modesty skirt. I cut a variety of leaves from the weed mat I hat bought, and leftover scraps. In three stages I layered these and sewed them onto a belt of elastic 60mm wide and slightly less than Sprog's waist circumference. The first stage was large cloth leaves, in case he decides to just wear the "leaves" at some point to make it more comfortable against the skin.


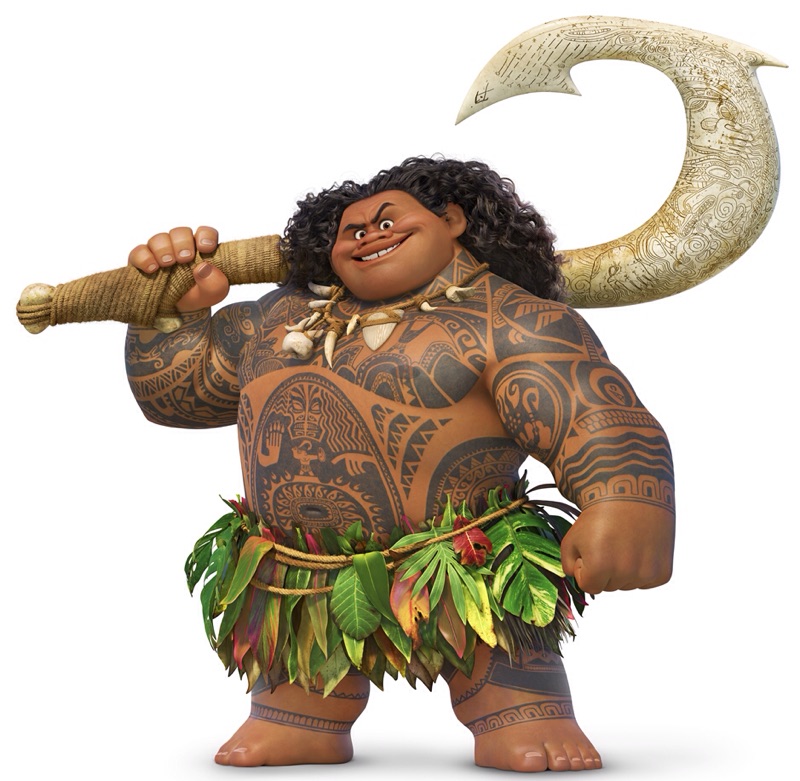
Maui's accessory is his hook. After sketching with tailors chalk I cut out a hook shape, then used the leftover from the middle of the hook to fashion a handle. On the handle I sewed straight lines with tan thread to distinguish it from the action part of the hook. When sewing up the hook before turning it inside out I was careful to leave a gap on the inside of the hook. Pulling the whole length of the felt hook through the narrow end wouldn't leave me able to push the barb points out.

Very carefully, and using a zipper foot I attached the handle part to the hook part then started stuffing. For a stiff hook it was necessary to have it very tightly packed. This hook is going to be swung about a lot by small people so it needs to be robust. Any weakness in the stuffing would allow a bend in the hook. There is still one small weak spot I am not happy with, but short of opening it up again I'm not sure I can get rid of it. I hand-stitched the close in two stages to get tight packing. The final step was to wrap the handle with twine to give it a bit more of a Maui look. I stitched the twine down then wrapped it around up the handle, and then back down again, securing at the seam lines using the hot glue gun.

Maui also wears a necklace of what I assume to be trophies, shark's teeth and the like. Sprog went to the beach with a friend and came back with some shells, one of which was perfect for a necklace.

And it was done!


Moana
Moana was easy to envisage but harder to execute. It's in three main parts, the top, the skirt, and the necklace.

For the top I wanted to have a shirred bodice for comfort, with a top section folded over for the beading. I ran into trouble when I couldn't get the tension right on my machine to use the elastic shirring thread. Flag that, Plan B was to use wide elastic to get a snug yet flexible fit. I put a section of elastic in the back between the two sides, then left the excess to 'wave in the wind'/be tied together as Widget wishes.  On the front I attached two flounces each with a row of silver fern beading handsewn along the edge of the flounce.

A section of the cloth was doubled over and sewn shut with curved ends to tie over the top of the skirt.


The skirt was easier in execution. I folded the weird sacking material on the angle to mimic Moana's skirt in the picture then layered the folded line with the 'grass' skirt and some cotton, then slowly attached the three together. The cotton layer was simply to make it more comfortable on bare legs. Slowly because every time I went fast I broke a needle. Then I checked against Widget and marked the length for once around his waist and attached velcro in two places, one at the end and the other one waist circumference away. Once attached I cut the sacking material shorter, shaped it with points, and used a single punch tool to punch holes in it. When I tried it on Widget he had trouble getting it to stay up. Little boys have no hips. I solved this with a pair of shortened Junior Joggers (Peekaboo patterns), with an extra wide yoga waistband and a strip of velcro on the front of the pants, and the inside of the skirt.

The last accessory for Widget was Moana'a necklace with the heart of Te Fiti (Whiti!). I removed many of the ferns from a length of the trim I put on the front of the bodice then interwove it with three lengths of cord, halfway down feeding two of the cords passed through the back of the broach/button. I hot glued the back of the button to ensure it would hang the right way up 


Saturday, October 7, 2017

A Renaissance Pirate Shirt and a Bob the Builder Shirt

Widget has been saying for ages that for his birthday party this year he wants a Bob the Builder party.

He has plenty of dungarees, so with a hat and the right shirt he will be ready to go. I have been looking for yellow and red check for a shirt like Bob's for ages. I finally found some. Last year I bought a pattern for the Bookworm Button-Up from Blank Slate Patterns but not got around to making it. I was in the middle of sewing it up too.

While I was collecting the stuff needed for the Bob the Builder shirt, Widget was invited to a Pirate Party. Over the last couple of years Sprog has attended a few pirate parties, and each time I have made something as part of his costume, there'e been a telescope, and a sword and scabbard; A pirate vest; and a pirate captain's hat. After the last party I felt that the vest needed more than just a t-shirt under it. It needed a pirate shirt.

I spent the week telling myself I didn't need to make a shirt. This morning I woke up and started sewing the shirt. I found the fabric in my stash. I think it was originally lining for curtains. It has a great washed out look and some sun discolouration.

I used the Bookworm Button Up pattern, with a few alterations, inspired by the shirts on the TV show Outlander, which is partially set in the era when pirates were swashbuckling.
- No pockets, no button tabs on the sleeves
- A wider collar
- No interfacing
- The front and back pieces were widened at the bottom to create a looser drape.
- the front was cut on the fold rather than as two separate pieces, then a cut about 1/3rd down the front from the neckline was added. I added a placket around the cut, and left plenty of extra at each end to use as ties to keep the neckline closed.
- I pleated the fabric before cutting out the sleeves, and kept those pleats for the assembly. This is again to put in more swishy fabric to create the voluminous look.

He was the best dressed little pirate at the party. Widget it not much of a model though.


After we came home from the party I went back to the original plan, finishing the Bob the Builder shirt. I still have to put on two buttons on the cuffs, but I have a very happy little Bob the Builder. I found the shirt really easy to put together. 

Coupled with some denim dungarees, a tool belt and a hard hat, he is all set for his party in December.


Saturday, November 19, 2016

A Batman costume for Sprog's best friend

Sprog's best friend was turning 5. When I suggested a Batman cape for Friend, Sprog said "No Mummy, a Batman costume". Admittedly I had just finished his Catboy costume at the time.

The basic costume is the same as the ones I made for Sprog and Widget. I cut an approximate shape out for the ears, and sewed around the two longs edges. After turning them inside out I stuffed them with some of the pillow that had been killed by the cat, then topstitched about 1cm in from the edges. The combination of stuffing and topstitching held the ears nice and stiff. These I stitched to the side of the hood, using a large square at the bottom of each ear. 

Both Batman logos I traced from images I found online, The grey for his tummy was edge stitched in black at all levels. The yellow on the back was edge stiched around the bat in black and around the oval in yellow. 

The cape was a repeat of the superkid cape I did for another party. Put the two together and you have a cool present. Give that present and you have a very happy 5-year-old.


Saturday, October 22, 2016

Sewing a hat for Paddington Bear

This week was book week at preschool. The last day was dress up as a book character day. It's something of a family tradition to go to book day as Paddington Bear. When my sister was fairly small, about 6 or 7 she saw a coat and fell in love with it. It is a blue wool coat with tartan lining and a hood, very similar to Paddington Bear's duffel coat. I remember wearing it to be Paddington Bear when I had dress up day at primary school. It is such a good quality coat, and so good for Paddington dress ups, that my mother never got rid of it. My sisters kids have all outgrown it, so it has been passed onto me for my boys. Last year Sprog had a Paddington Bear party, but only wore it a few minutes as it was a warm day. Now it's time for the coat to come into it's own on book day, but to complete the look he needed a hat. A great big floppy red hat.

I have been meaning to try the Reversible bucket hat from Oliver+S for a while now and this was my chance,  albeit with a few modifications.

After a quick poll of facebook friends to confirm my instinct I went with felt in a bright red. The pattern calls for two layers of each section, giving the hat it's reversible quality, but since this was specifically for Paddington, and felt is a bit stiffer than the cotton it would usually be made of, I went with a single layer.

I cut the crown to the pattern. The sides I extended by tracing the bottom edge then moved the tracing paper over two inches before tracing the top edge, and ruling the sides anew. Doing it this way rather than just extending the sides two inches ensured that the crown would still match. The brim I also extended, this time I measured an extra two inches out in a number pf places then redrew the edge around those 2 inch points.

Then it was just a matter of following the instructions to put it all together. I trimmed the seam allowance in the crown, and sewed the brim/side seam flat to help the shape. The extra two inches make the brim super floppy, but Sprog is happy with his new hat.


Tuesday, October 11, 2016

Capes to the rescue - A superhero and a girly cape

Sprog was invited to yet another party. Should anyone be reading all of this blog they will have started to notice a theme. This time was for a girl turning 4, and her little brother turning 2. Widget came along too as he knows birthday boy.

I didn't know anything about either kid. Sprog says he doesn't play with birthday girl, but the teachers at preschool assured me she was a girly-girl so I went for my fallback of something pink and sparkly. I used the same pattern as the last time I made a cape, but this time the fabric was both pink and sparkly, rather than pink with a sparkly overlay. I finished the seams by flat felling them, then trimmed with inch-wide ribbon. The ribbon was laid around the edge of the cape first. I then used a separate piece around the hood, with about 30cm/12in excess on each end to use as the tie.


Birthday Girl opened it, put it on, said she loved it, then dashed away to play dragging Sprog with her. 

Little brother Birthday Boy is another kid I know very little of, but having two little boys I was at less of a loss. Superheroes are always popular, so another cape was planned. I left my options open and went fabric shopping. I ended up with some plain black cotton, and a red velour with spiderwebs all over it. With some yellow fabric I had already, I planned a reversible Spiderman/Batman cape.

I used the Superkid cape pattern from Peekaboo patterns as my base, first cutting out the cape, then using the scraps for the bat shape. Using a Bat Signal image I found using Google,  I traced the bat onto double sided interfacing and ironed it on, then cut, ironing the shape onto yellow before stitching round the edges with a black zig-zag. 


If you look closely you can see a yellow bat shape.


I backed the yellow with single sided interfacing to strengthen it,  cut the oval about 15mm from the edge of the bat, pinned it in place, then used yellow thread to zigzag the outer curve. You could use double sided interfacing again, but I was running low, and it was an easy shape to sew in place anyway. 


Before assembling the two sides I put a little interfacing in the ends of the straps to stabilise where the popper was going to go. 


Then it was just a matter of sew it all together, turn, topstich the edges and attach the popper. Sprog modelled it for me and it was ready to go.


I bought way too much fabric, so I think Sprog's Batman mad bestie might be getting something similar for his birthday next month.

Saturday, September 24, 2016

A simple pirate hat

Sprog gets invited to a lot of pirate parties, previously I have made him a cardboard tube sword and scabbard, and a pirate vest. I have been talking about using the pleather scraps from the vest to make a hat for a while, so the time had arrived.

It was a very simple sew. I took a large square of pleather and folded it wrong sides together. Then I tucked the fold in on itself. You could also get this effect by folding right sides together, then folding back over the fold leaving an inch or so of the original fold in place.  I sewed perpendicular to the fold at each end.

Next I cut an approximate pirate shape to the fabric and stitched around the edge. Pleather is hard to sew on my machine when the right sides are out, as it sticks against the foot. To combat this I used masking tape down the line where I wanted to sew, sewed the line, then peeled the tape away.

Next up I cut a slit in the original fold, and tested it on Sprog's head. I repeated this till it was nearly right, then rounded off the ends of the slit. The rounding off was to make it less likely to tear, and to make it prettier.

This morning shortly before the party Sprog cried "Mummy, you gotfor the bones" (His own take on forgot). Indeed I had, or rather I wasn't going to bother until he said something. Ideally I should have put the "bones" on before sewing it up, but since I was making it up as I went along that was risky business. 

For the bones I cut a skull, lower jaw and femur bones out of the pleather which conveniently has a white backing. I also had white knit scraps I could have used, but the pleather is stiffer and will hold shape better, and the two "leather" sides stick together well making them easy to keep in place while sewing. I tacked them in place using a needle and thread, big stitches as I was in a hurry and the hat was done.

Here's my happy little pirate.

Next pirate party it will likely be the turn of the flowy pirate shirt, or the pirate trousers.


Saturday, May 7, 2016

Sprog's Pirate Party

Sprog was invited to a 5th Birthday party. A pirate party. When asked he said he wanted to get Birthday Boy a telescope. After a bit of thought I figured out the best place to go and found an awesome extendable kaleidoscope in just a few minutes. With time to spare I decided to go the extra mile for the pirate dress up.

I found some cheap pleather at the local Emporium and set off home. Rather than faffing about, I decided to just use the Simple Vest pattern I used for the Paw Patrol vest. I trimmed all the edges with white bias trim, then attempted a couple of darts in the back to shape it a little, and wrapped a length of pleather around the middle for a belt.

Sprog dressed up with his stripey pirate t-shirt and a bandanna on his head. He had some hand-me-down jagged bottom dress-up pirate trousers too, then to complete the look we added the sword and scabbard I had hurriedly made for the last pirate party he went to.


In hindsight I would have extended the fronts a bit wider to make for a better coverage crossing over, and to create more of a floppy foldback collar.

He kept this outfit on all day, we went to a friends housewarming, and onto a fundraising quiz, all with him as Pirate Sprog.

Dress-up win!